AppStream Image Builder Automation Part 1 – We don’t like UI
During the lockdown period, we received several requests to implement Amazon AppStream 2.0 for our customers. How surprising !
Amazon AppStream 2.0 is a managed service allowing you to publish your application to your users using a remote display technology (similar to Microsoft Remote Desktop Services, Citrix Virtual Apps, VMware Horizon or Nutanix Frame). Since early August, it also allows you to publish a full desktop to your users. There is no infrastructure to manage, only your AppStream server images.
Laurent Mas and I decided to take on the challenge of automating the AppStream Image builder process without connecting on the image builder at all.
Automate everything
Here are the advantages we see in automating the AppStream Image builder:
- Consistent image building
- Easy to keep up to date with Microsoft patching or AppStream agent updates
- Can be integrated with a CICD pipeline
A few things to know before we start diving in the implementation:
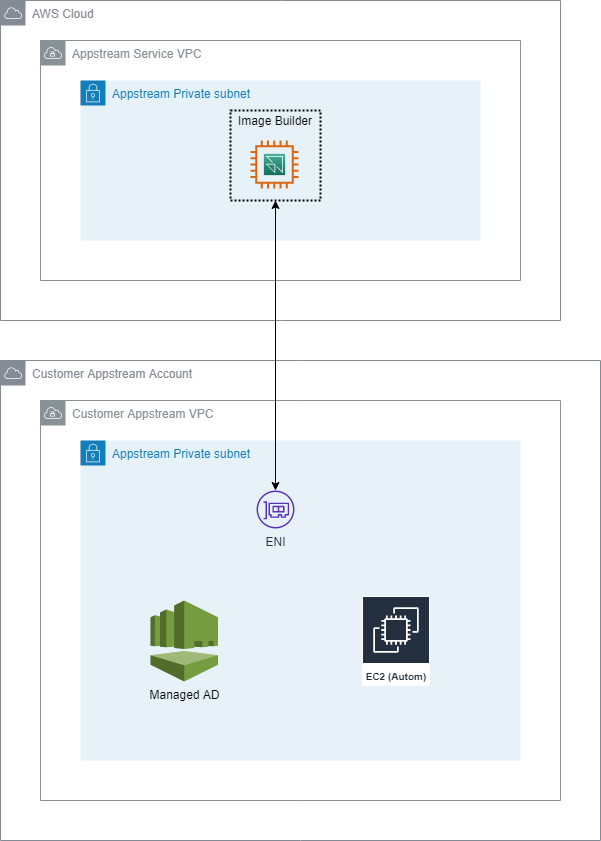
- AppStream instances all have two Elastic Network Interfaces (ENI): one in your VPC and in a VPC managed by AWS. This might be important when sizing your subnets.
- You can join AppStream instances to an Active Directory domain, including the image builder.
- The AWS provider for Terraform does not support Amazon AppStream
Our tools:
- Terraform / CloudFormation
- PowerShell/WinRM
- Chocolatey (https://chocolatey.org/)
We implemented the automation on a Windows EC2 instance as we were going to use WinRM to talk to the AppStream image builder.
Some literature existed on the subject on the AWS blog (here) but the very first step in the blog post was manual : connect to the AppStream image builder on the AWS console!
Joining AppStream image builder to AD
On the AppStream image builder, we don’t have userdata to bootstrap our instance and there’s no API to retrieve the local administrator credentials so… the only solution we found was to join the AppStream image builder to an Active Directory domain in a specific OU (Organizational Unit) with a GPO to configure WinRM.
Luckily, the AppStream AD configuration is possible through CloudFormation and we already had some Terraform code to quickly deploy a managed AD in AWS Directory Service and configure the DHCP Options Set.
As a side note, you don’t need a full blown AWS Managed AD. You could simply run a single Windows domain controller on a Windows EC2 for your image builder needs. Your AppStream instances created from that image do not need to be joined to an Active Directory domain if you don’t want to.
From our Windows EC2, we could now instantiate an image builder with the latest Windows Server 2019 image and join it to our AD domain. Here is some code to illustrate how we select our start OS and how to create the image builder instance:
$aws_image = Get-APSImageList | where-object {($_.Name).StartsWith("AppStream-WinServer2019")} | sort CreatedTime | select -last 1
WriteLog "Latest Windows Server 2019 appstream image: $($aws_image.Name)" $LoggingFile 3 "full" "AppStreamImage"

WriteLog "Creating a new image builder: $target_image_name" $LoggingFile 0 "full" "AppStreamImage"
$new_image = New-APSImageBuilder -InstanceType $image_builder_instance_type `
                                -Name $target_image_name `
                                -DisplayName $target_image_name `
                                -ImageName $aws_image.Name `
                                -EnableDefaultInternetAccess $enable_internet `
                                -VpcConfig_SubnetId $subnet_id `
                                -VpcConfig_SecurityGroupIds $security_group_id `
                                -Region $region `
                                -DomainJoinInfo_DirectoryName $AD `
                                -DomainJoinInfo_OrganizationalUnitDistinguishedName $image_OU `
                                -IamRoleArn $appstream_role_arn
The image builder will take several minutes before being ready, then you can power it on:
WriteLog "Starting the image builder: $target_image_name" $LoggingFile 3 "full" "AppStreamImage"
Start-APSImageBuilder -name $target_image_name
After a few minutes, we can to retrieve the IP address of the ENI running in our VPC for this particular image builder:
# list ENI and find the one for our image builder
$new_image = Get-APSImageBuilderList -name $target_image_name
$ip_address = $new_image.NetworkAccessConfiguration.EniPrivateIpAddress
WriteLog "Image builder $target_image_name has IP address $ip_address" $LoggingFile 3 "full" "AppStreamImage"
Configuring WinRM
In Active Directory, we have configured a startup script in a GPO to configure WinRM and also a service account setup as local admin of the image builder.
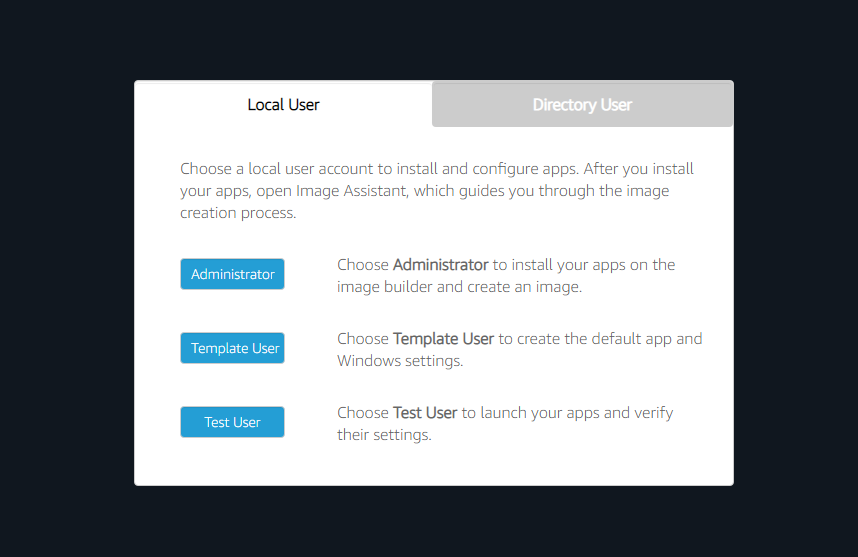
From now on, we can just use Invoke-Command or similar commands to install our applications and configure our image using our AD service account. You’ll need to use the Image Assistant to let the AppStream service know about your published applications.
I’ll go into more details about this part in a future blog post.
To create the image, from within the image builder WinRM session (Invoke-Command), you’ll have to invoke the Image Assistant executable and instruct it to create the image with a chosen name.
$exePath = "C:\Program Files\Amazon\Photon\ConsoleImageBuilder"
Set-Location $exePath

Write-Output "Creating snapshot for image builder $IBName"
$CreateCMD = '.\image-assistant.exe create-image --name ' + $ImageName
$Create = Invoke-Expression $CreateCMD | ConvertFrom-Json
if ($Create.status -eq 0) {
    Write-Output "Successfully started creating image $ImageName"
} else {
    Write-Output "ERROR creating Image $ImageName"
    Write-Output "$Create.message"
}
After launching the image creation, the image builder instance will automatically shutdown and you can proceed with deleting the image builder.
while ((Get-APSImageBuilderList -name $target_image_name).State -ne "STOPPED"){
        WriteLog "Waiting for image $target_image_name to be snapshot, sleeping for $retry_time seconds..." $LoggingFile 6 "verbose" "AppStreamImage"
        Start-Sleep -s $retry_time
    }

    WriteLog "Removing the image builder: $target_image_name" $LoggingFile 3 "full" "AppStreamImage"
    Remove-APSImageBuilder -name $target_image_name -Force
Please note that we can delete the image builder because we automated the whole process, including application installations. If you install your applications manually, then you may need to keep this image for a future update.
Credits: Thanks to Mathieu Dalbes for the long hours spent testing and debugging with us!
References :
Commentaires :
A lire également sur le sujet :